
DIY Home Dec & Save $14,000? You Can!

Learning to sew – even mastering a few basic skills – can save you thousands of dollars, especially when it comes to home decor. And, it’s not as hard as you might imagine.
Want to save money? It’s hard to beat the DIY model – Do-It-Yourself. Yes, take up sewing (or painting, carpentry, laying tile), and you have the potential to save thousands of dollars. You don’t need to be an expert.
Y-E-S, you can D-I-Y!
Like many new homeowners, we became DIYers because we were young and on a shoestring budget. We started with easier projects where our learning mistakes weren’t as noticeable – building a small deck, tiling a porch floor, making bedroom curtains. The best thing we did? We started. So can you.
But your home dec projects have to look good too, right? So not amateurish and sloppy. And, you’ve got to F-I-N-I-S-H, not just get almost done. While you don’t have to be experts, it helps if you’re not a novice. So when our daughter and her husband bought a fixer-upper house, we were pleased when they followed in our DIY footsteps. As first-timers, they were definitely ambitious though – installing wood floors, moving walls, doing drywall, wiring, painting – a major makeover.
So imagine my surprise when she announced she was hiring a pro for custom window coverings – Yikes, that’ll cost a fortune! And, this daughter knows how to sew!
Can you sew a straight line?
When she told me, our phone call began like this: “Yes, mom, I can sew, but you seriously overestimate my skills. Besides we need the privacy now and I have NO time,” she lamented. “We’ve just got to get it done.”
Encouraging, I countered with: “But you so can do this! You sew straight seams and follow the directions. You know you’ll save a bunch. Want me to fly out to help you?”
Nope, she already had booked two different professionals to come and estimate her project – floor-length (and 10′ tall) drapes and sheers for one 102″ dining room window and two skinny double-hung windows in her small parlor, also 10′ tall. All faced the street.
After each estimator visited and returned quotes, came the sticker shock: $12,000-14,000…plus tax! Yikes!
The phone rings.
“Hey, mom….were you serious about flying out here to make those drapes?”
Ha.
Six days later, our marathon window covering session began.
What’s it cost to sew drapes?
We estimated our supply costs as middle-of-the-road, not going super fancy but not the cheapest materials either: so $600-900 for the drape fabric and lining, upscale rods, and stylish, heavy-duty drapery hardware, and miscellaneous sewing notions/supplies needed to do the job right. We ended up spending a little under $650 for the dining room and parlor window coverings. That’s major savings. (We already had a sewing machine, steam iron, glue gun, drill, staple gun and other tools. And while the time was donated, the airplane ticket was $380. ; )
How much time to make drapes? It took roughly 8 days to find/purchase, cut, measure, sew, press and install everything. Here’s how we did it…
10 Steps to Make Easy, Custom Sheer Drapes
My daughter had already chosen her basic drapery style (since she had to give the pro something to estimate). She was going floor length and nearly to the 10-foot ceiling. She wanted to line the drapes as well as use sheers, so we would use two rods and rings. She also decided on the “stack back” (That’s how much fabric would hide the walls beside the window when the drapes were pulled open.) She was still debating how to finish the top – maybe a swag or something similar, but we knew we would be hanging something to cover the rods.
1. Choose your drapery style.
Consider if you want window coverings for privacy, to keep out light, block a view, soften a room. Will you want to open/close the drapes or the windows they cover? Do you want the woodwork to show or be covered?
2. Purchase the rods and attachment hooks.
My daughter purchased these first, because you need to know how high to hang the rods in order to get accurate measurements for the fabric yardage. But you could also fall in love with a fabric first, then choose the most suitable rods and hooks/hardware.
3. Measure and buy fabric.
Day one, when I arrived, we immediately shopped for fabric. While my daughter wasn’t too picky, it was still a trick to find a suitable color in the right weight – and in enough quantity. Remember – floor-length. So we needed 20-22 yards, plus about the same amount of lining and sheers. We also wanted them to look full and drape nicely.) We scoured Jo-Ann’s fabric store to find a soft, nubby grey that flowed softly and would drape well. Perfect! Unfortunately, we had to go to several stores to get enough yardage as one store did not have enough. (If you have time, there’s the option of on-line ordering and delivery to one store so it’s all in one place. This would have saved about 8 hours of traveling to stores, but it would delay the project 2 days.) Fortunately, we located enough fabric to purchase – or we would have been forced to choose another. Since the sheer fabric was a standard in-stock product, we got it all on one bolt. Plus it was 108″ wide – a great bonus, since that meant no vertical seams to mess up delicate fabric!
4. Hang the rods first.
To know exactly how long to make the drapes, hang the rods before cutting fabric. We also needed to ensure the brackets would support the fabric’s weight (floor to ceiling can be heavier than you think). We opted for two rods, with one for the drapes and one behind for the sheers. (My son-in-law installed the rods and would later fasten a 4″ x 1″ x 108″ pine board above them, to hold the swags.)
5. Measure, measure, then cut fabric for one.
Day 2: Time to measure and cut the fabric for one side of the large window. I decided to start with the sheers. I measured (twice at least!) to find the exact finished length – plus we added 8″ for the bottom hem and 6″ for the top fold-over. Sheer fabric is really slippery, so measuring and cutting wasn’t as easy as I expected. To add to the difficulty, I worked on the floor, because the counter wasn’t long enough. Also, work on only one panel at a time and do not cut everything, in case you need to adjust measurements.

6. Sew, finishing side edges first.
Since one width of the 108″ fabric made one sheer for one side of the window, I finished the left and right edges first without sewing a vertical seam. I folded, pinned and pressed the edge and debated on whether to sew by hand or machine. I experimented with the machine’s blind hem stitch feature, making space between stitches about as long as possible, more like a basting stitch. That worked really well. And, it was much quicker than sewing it by hand, an alternative option that would have looked equally nice.
7. Next, hem the bottom of the panel.
Next, I folded, pinned and pressed a 4″ hem in place for the sheer panel. I used a double hem (8″ of fabric) because it hangs better. Again I used the blind hem stitch. Three sides done on the panel – things were going smoothly so far.
8. Sew the top pleats.
Now to finish the top. We were using a box pleat design, and a round clip would fasten to each pleat and slide onto the rod. Again, I folded and pressed the top for a 3″ pleated finish (doubled, or 6″ of fabric), and adding a featherweight interfacing inside to stabilize the sheer fabric. (Beware of using iron-on interfacing as it will be too stiff.) The key here was carefully measuring left to right/top to bottom so the panel would look great and hang properly (it would hang an even ½” from the floor). We wanted the pleats spaced evenly left to right, ending with a pleat on each end/corner. I pinned the pleats in place, measured again and sewed vertically (with wrong sides together) to get the boxed pleat look desired.
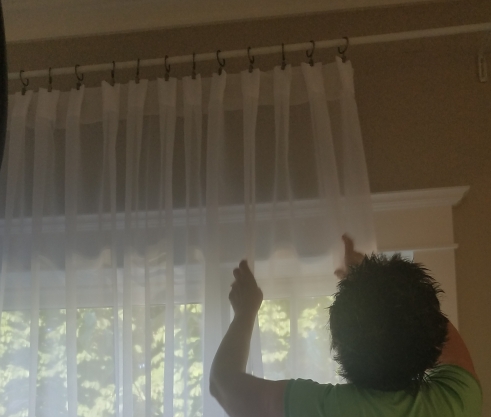
9. Hang the completed panel.
Now the time of reckoning. Would the sheers look good and do the job? We strung the clips on the rod, attached each to a pleat, adjusted the spacing a bit…and voila! Sheers are up for one side of the picture window. They looked good and opened/closed like they should, so we followed the same steps to complete and hang the second sheer panel for the other side.

10. Adjust panels, add drape weights.
We helped the sheers hang perfectly by adding a drapery weight (basically a metal washer) in each lower corner. Added bonus…we didn’t have to iron the sheers, as the wrinkles fell out with the weight.
Completing sheers for matching windows
Then we basically used the same process to sew matching sheers for the skinny parlor windows, using one 108″ width of fabric for each window to get maximum fullness. We had one exception in sewing and construction: Since the windows were so much narrower, the sheers would likely not be opened/closed. So we opted to make them stationary. Since the top of the sheer would be covered by a swag and never visible, it was easier and quicker to gather the fabric on the rod. So we simply double folded the top edge and stitched a casing/pocket about 2″ deep. Instead of ring clips and box pleats, we slid a 1¼-inch rod through the casing and gathered the fabric to get the desired fullness. This took much less time and saved the cost of extra rings that didn’t function or show anyway.
Sheers are done. Time to change the sewing machine needle from delicate to heavy-duty and create the heavier, lined drapes.
Easy Step-by-Step to Sew Lined Draperies
Note: My daughter and son-in-law had decided the drapes would be topped with five matching swags, which would give a great professional finish that complemented their craftsman-style house. But it did mean we had to carefully optimize our fabric so we had enough yardage for everything. Measurements were extremely close – no mistakes or do-overs allowed!
1. Measure from rod to floor.
We would hang these drapes on the second rod in front of the sheers. We needed to make sure the drapes were definitely as long or even a tad longer than the sheers but not touching the floor. (Being shorter would look awful.) This means the top to bottom measurement will be about the same as it was for the sheers. But it was not exactly the same.
2. Make sure the grain is straight BEFORE cutting.
Next, we made sure the grain of the fabric was straight so it wouldn’t ripple or hang askew. Since it was a solid color, we didn’t have to worry about matching a design, stripe or nap from one panel to another. We would use two widths of fabric – about 48″ each – which we would line then pleat for each side of the big picture window. That meant four pieces – each about 48″ by almost 10′ – which is a lot of fabric and weight.
3. Cut fabric, sew vertical seam for one drape.
So we cut the two widths the desired length and seamed them (right sides together) to make one large piece of the gray fabric. We pressed the seam open. We prepared the 4″ hem, same as the sheer drapes, using a double hem and the machine’s blind hem stitch. Seems like a waste to use double the fabric for hemming? The reason you don’t skimp and use less fabric is to get the professional look of softly hanging pleats and the weight of the extra fabric helps do that. 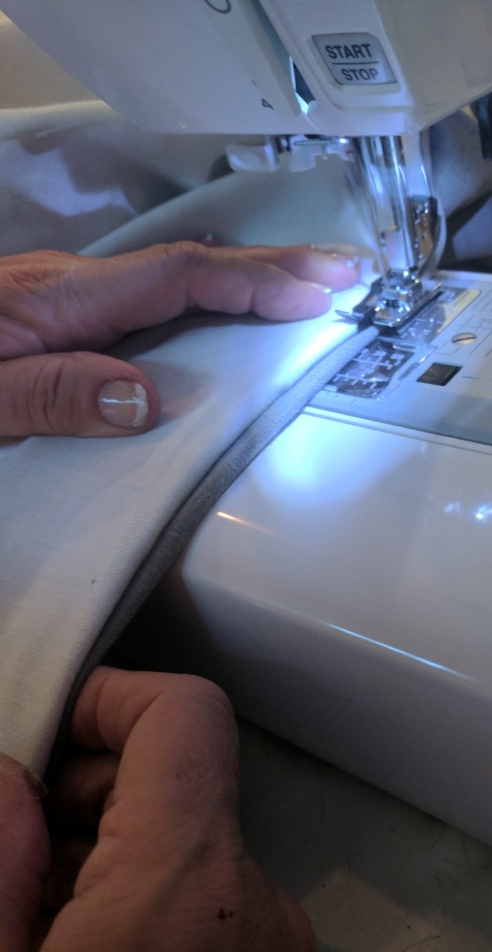
4. Cut lining fabric, sew vertical seam, press and hem.
We repeated this same process for the lining panel (sew/press vertical seam), using a slightly narrower and also shorter length of standard white lining fabric (we used Roc-lon). We’ll sew a hem just 2½” deep (5″ folded over instead of the 8″), which gives a finished length about 1½” shorter than the finished grey drape. Again, we hemmed with the machine and not by hand.
5. Attach hemmed lining to hemmed drape, wrong sides together.
Next we attached the hemmed grey panel to the hemmed lining. Matching wrong sides together, we laid the lining on top of the grey drape and kept the lining hem 1½” shorter than the bottom of the grey fabric. Your left-edge-to-right-edge lining measurement will also be slightly shorter – as much as 2″ on each side, but this will depend on how wide your lining fabric comes (Ours was about 44″). Since you will next finish the left and right edges by folding over each side, having a shorter lining measurement reduces the bulk for you and means you don’t have to be that exact.
6. Finish the left and right sides together.
So we finished the left and right sides by folding over about 2″ and used the blind hem stitch to finish each side as one unit/piece. You could sew these by hand if you want. But for this fabric, the blind hem stitch was not noticeable and made the job go soooo much faster. (We did miter the bottom corners by hand, and added a drapery weight in each. You can do this now or right before hanging.) 
7. Finish the drape top.
Now to finish the drape top. We decided to go with an inverted box pleat design. This is similar to the sheer style we already pleated, but the pleat shows on the back side rather than the front. We used a 4″ strip of regular weight interfacing to reinforce the top, folding over 8″ of fabric to make the 4″ casing. We pinned and pressed this in place before sewing because it was easier to handle. (We did not have to press the sheers for this same step.) 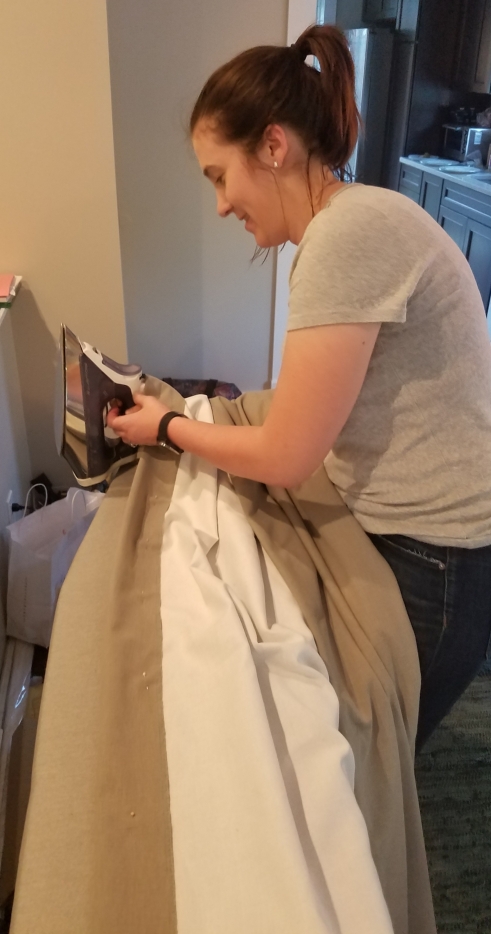
8. Measure, pin, adjust pleats for visual appeal.
We measured and pinned each pleat, wanting to end with a pleat on each end to look great and hang properly. Our pleats measured roughly 4″ apart, but this is where you do the math to get the desired width and make sure your pleats are evenly spaced across the entire panel.
9. Anchor pleats in place.
We did not sew straight across the drapery panel to make a casing, but anchored the fold and interfacing by sewing 4″ vertical seams for each pinned pleat. This would be adequate to hold the folded top in place and allow for softer draping.
10. Attach to clips/rings on installed rod.
Since the rod was previously installed and rings attached, we were ready to clip a pleat to each ring and adjust spacing. We were all pleased with the look, so we made a matching panel for the other side.
Next, we did the same for the two skinny windows. Since these would be stationary and we were short on grey fabric, we cut one grey panel approximately the same length as the others. Then we cut it in half lengthwise and repeated steps 4 thru 10. (The panel was less full than we originally wanted, but we were limited by the amount of fabric available.) 
How to Make Drapery Swags
Time to tackle the swags – the biggest challenge. Getting these to look great is all about making a paper pattern, then doing a fabric prototype to measure and pin folds to look good before you make the real thing.
- We made a paper sample of what we wanted the finished swags to look like and taped the sample on the wall above. Our semi-circle pattern imitated the finished length and width desired for each swag – it was not the actual size or length of the fabric panel we needed (which would be much longer and a bit wider.)

- Next, we used a piece of scrap lining to make a prototype we could fold, experiment with, and pleat to get the desired look and length. We started with a flat piece of fabric that measured about 40″ top to bottom, and about 46″ from left to right.

- Satisfied with the width and length of our sample swag, we carefully measured out the fabric, only to find we were a few inches short. So, we recalculated and made the folds slightly less deep, using about 38″ from top to bottom. (Remember, we were limited by the total yardage we had. We had to make it work!)
- Then we cut the grey fabric and lining for one swag. With wrong sides together we sewed the bottom of the swag in the curved shape we desired (we followed the semi-circle design). We trimmed and pressed open the seam and turned the wrong sides together, rolling a slight bit of the grey toward the lining side and stay-stitched, so white wouldn’t show. We pressed it in place and pinned the other three raw edges together. This gave us a long, flat piece with a finished, curved edge at the bottom, and the wrong sides of fabric and lining are together.
- Now to fold up this flat piece for the finished swag. It took several tries to get the folds to line up just right. We used a thick piece of styrofoam and heavy duty pins to measure and anchor the folds while we worked with them. We could then adjust the folds and hold up the swag to make sure we left enough length between pleats. Our goal was the look of luxurious folds that covered the rods and top of the drapes. With a bit of adjusting, it worked well, thank goodness.
- So we measured and cut the remaining fabric and lining for four more swags – and hoped we didn’t make mistakes. Now getting the folds to lie similarly took a bit of patience, but it eventually came together.

- Next, we covered our 4″ x 1″ board using the remaining 10″ of fabric and a hot glue gun. (We literally ended up with only a few handfuls of scrap fabric to spare – Whew!)
- We would use right-angle brackets (metal) to secure this board (about 10′ long) to the wall above the rods. (Be sure to screw the brackets into a wall stud and not just the drywall, so they don’t pull loose later.) We used one bracket on each end and two near the middle, to make sure the board wouldn’t sag.
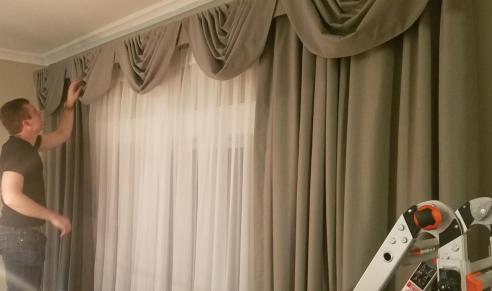
- Before actually attaching the board to the wall, we put it on the floor to get the swags evenly spaced and draped correctly. Then we hoisted the whole unit in place above the drapes for a final inspection. Satisfied, we returned the board to the floor and used a staple gun (and 1/4″ staples) to secure the five swags to the board. (This went quickly with two people – one to staple and one to hold the folds in place.) We cut off the excess fabric so the board would be tight against the wall.
- Time for the final step – we attached the board to the wall…done!
 11. For the skinny windows, we needed swags a bit wider and not as long in order to look proportionate. These swags would also attach differently, as a board was not necessary. So we gathered each end and secured them on the stationary rod (same one holding the sheers and drapes) with a large, heavy duty rubber band. We made a grey tie from leftover fabric, so cover the end of the rod and the rubber band. Then we adjusted the folds to mimic the swags on the large window.
  The project was finished, on time and under budget…yeah! Now, onto the bedroom curtains…but that is another story.


Leave a comment